Monday, July 16, 2012

Chocolate Ice Cream Sauce

I have been MIA for a week or so because I had misplaced my camera. I have found it and I have been busy in the kitchen all day. Here is my first small post on a lovely chocolate ice cream sauce I threw together for my kiddos to munch on. It takes just about 5 minutes to make and its amazingly good.

First melt 1/2 stick of butter in a small saucepan on medium heat, make sure not to burn the butter.


Then add roughly 1/3 cup of chocolate chips, stir with a whisk until melted careful not to burn the chocolate chips.


 Remove the pan from the burner and add 1/4 of milk and 1 tsp of vanilla extract.


Also add 1 cup of powdered sugar to this mixture and stir until all lumps are gone.


 Let cool for about 1 - 2 minutes and then pour over vanilla ice cream or whichever flavor you choose.


~Enjoy!~


Sunday, July 8, 2012

Quick Bacon Sammy

I was looking for a quick lunch today that I could make while I was chopping up ingredients to put in the slow cooker for dinner tonight. Here is what I came up with and it's super easy!

2 slices of bacon, turkey or regular
2 slices of tomato
1 tsp mayo
1 bagel, I used everything flavor
Sprinkle of salt on the tomato slices, if desired and to taste


I used my toaster oven for all the cooking involved in this sandwich. 
First I took the baking pan in my toaster oven and put a sheet of foil on it for easy clean up. I then put the 2 slices of bacon on it and baked them for 10 mins in the toaster oven. When they were all crispy I took them out to drain on a paper towel. I then put the bagel in the toaster oven and toasted it on medium dark. While it was toasting I sliced up the tomato and sprinkled a small amount of salt on the slices. When the bagel was finished toasting I spread on the mayo and layered the tomato, then the bacon, then another slice of tomato. Simple and amazing. Not really diet friendly but very time friendly. Enjoy~!


Thursday, July 5, 2012

Baked Zucchini Bites

Every wonder what you can make as a quick healthy side dish that your kids will love? I made just the perfect recipe tonight. My garden has been putting out some good sized zucchini for about a week and I am trying to incorporate it more into my daily menu. This recipe is quick and delicious!

First here is what you need: shredded Romano cheese about 1/4 to 1/3 of a cup depending on taste,  2 medium zucchinis, garlic salt, canola oil spray or olive oil spray and fresh ground black peppercorn.


Cut the zucchini into wedges about 3 inches in in length and 2 inches in width. Spray a baking pan with the oil and arrange zucchini on the pan. Spray the tops of the zucchini with the oil then sprinkle on the pepper, garlic salt and Romano cheese to your liking.


Bake at 400F for 15 mins.

Then ENJOY! My 4 and 5 year old's loved this as a side dish for dinner tonight.


Kitchen Organization

Here is a great set of 6 organizing items for your kitchen, they are cheap and amazing! I can't wait to add another set to my kitchen.


 Here is a pic of how they can be used, note that there is a "bread" basket. I use mine to hold items that are hard to stack like bags of chocolate chips, rice, beans and powdered sugar. There are six items that come with the organizing package, I have only included a picture of 3 of them, to see the others follow the link above to www.walmart.com. Enjoy~!


Wednesday, July 4, 2012

DIY Decor

I thought I would do a quick share of something I did a couple months ago and LOVE! Cheap decorating is an essential with today's economy and anything is better than no decorations at all. So here is a little trick I learned. I know you must have some old paperback books lying around and lets be honest here, they don't always have pretty covers and some are just plain ugly. I took a stack of 3 old books I found and gave them a quick and simple new life by just covering in a neat scrapbook paper (that matched my existing decor) and stacking in ascending order. No glue necessary, just cut them to the right size to fit the books like a simple dust jacket and stack them. Here is a picture of the finished product:

Happy Crafting!

Magic Mike!

Just a small tribute to the cast of Magic Mike! I can't wait to add my review of this movie. ;)


Fireworks!

Happy 4th of July everyone! I just wanted to share a few pictures that I took last night of a local fireworks show.


Have a blessed holiday everyone!

Tuesday, July 3, 2012

Canning Tomatoes!

So today I finally broke down and got to canning my tomatoes. I can't wait to be using them throughout the winter. Here is a quick recap of how I canned them:


First I washed all the tomatoes thoroughly, they came from my garden so this didn't take long.


I then just sat them in a colander and a couple mixing bowls since I had quite a few tomatoes (6 1/2 lbs).


I got all my pots filled with water and started to get them all boiling while I cut X's on the tomatoes. I needed of course the big canning pot, a small sauce pan for the lids, a slightly bigger one for boiling water to add the the jar of tomatoes, and lastly the 6 qt stockpot to boil/blanch the tomatoes in.


 Next I made shallow X's on the bottoms of all the tomatoes with a sharp knife. 


 I got a large bowl ready for the shocking the tomatoes by putting several cubes of ice in the bowl and filling it with water to make a nice cold bath for them.


When I got the 6qt stockpot boiling I added about 4 - 5 tomatoes at a time for about 30 - 45 seconds until they started to crack. Then I put them into the water bath to shock them.


After they cool in the water bath which is around 1 min, they were ready to be peeled and chopped. The skins came right off so easily.


I chopped them up and got them ready to add to the jars. I made sure to have a clean towel under the entire work area because tomatoes are messy and when the jars come out of the canner they need to be placed on a towel to cool anyways.


After I had chopped some of them I prepared the jars by adding 1 TBS of lemon juice to the bottom of each of the jars. I used small half pint 8 oz jars so that was plenty of "acid" for them to be safe.


I then added the tomatoes to the jars leaving about 1/2 an inch of space at the top of the jars and used the bubble removing tool to get out any air bubbles in the jars. I added boiling water to the jars  filling them to about 1/4 from the top of the jar and used the bubble tool again just to make sure they were ok before adding the lids.


When they looked like this with the lids on tightly I added them to the canner to boil for 30 mins.


And wahlah lol here is what they looked like when they were set out to cool down and finished. Some obviously I stuffed with more tomatoes than others, no biggie they are just fine and delicious. I got 11- 8oz jars out of my 6 1/2 pounds of tomatoes with just over a pound left over to make some sauce for pizza tonight.


A little off topic here but it is getting close to the 4th of July. 


Found this picture of my son Zac from last 4th of July.

My husband Jeremy finally has the 4th off this year for the first time in 4 years, which is really great because he works at night and we will finally be able to take the kids to see the big fireworks together tomorrow. Our town is having their smaller fireworks show tonight so for that it will just be my kids and I. What is everyone else doing for the 4th of July? Leave me a comment to let me know or if it's past the 4th when you are reading this let me know what you think of my canning tomato tutorial. :-)

Sunday, July 1, 2012

How to Make and Can Strawberry Jam

Ok I just finished my first batch of strawberry jam and hopefully the results will be fabulous. And from what I have tasted it will be great!

Here is a little visual on how I made it:


Here are some of the ingredients I used to make the strawberry jam. The lemon juice is not pictured.

First I rinsed the strawberries in a colander and then began chopping them into small pieces.


This is double the amount needed for one batch of this jam, I made two batches separately but chopped them all together.
After the strawberries were chopped I added them to my small food processor/chopper and pulsed them until the looked like the next picture. You can chop or process them to your liking, I just like mine less chunky than some people. 
I put the processed strawberries into another bowl and scooped them into the measuring cup to be sure I got exactly 5 cups into the pan.
After I added all the processed strawberries to the pan I then added 2 TBS of lemon juice and stirred.
I measured out 7 cups of sugar and set aside before I started cooking the strawberries.  
I filled this pan with water just under 3/4 of the way full and turned on just past medium until I got a gentle boil.
Since I don't have a canning rack for my pan, I added the jars I was going to use to this big pot before it started to boil and took them out after the water was boiling. So I could fill them with the jam when they were still hot and put them back in the water without them cracking.
I added boiling water to the lids and set them on a cool burner.
Before I turned on the burner I stirred in 1 packet of Sure Jell. 
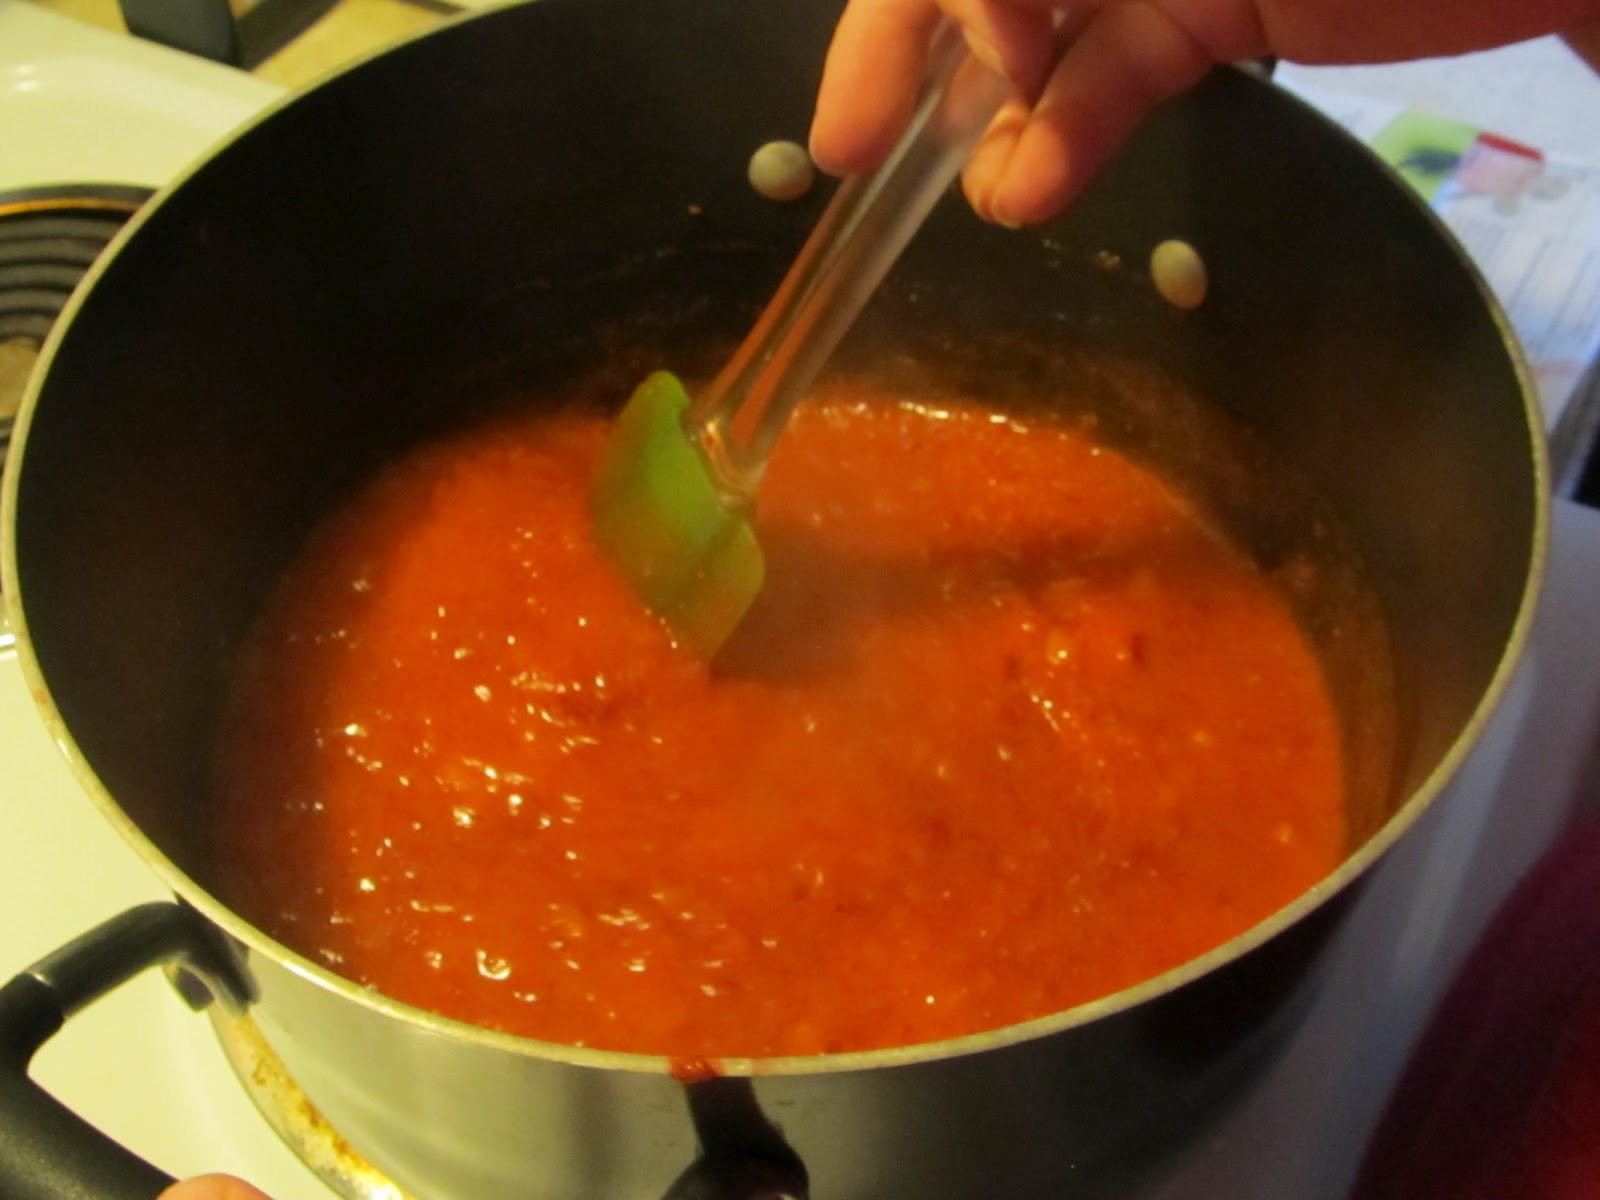
Then I turned the burner on high, stirring it constantly until a rolling boil was reached.
When the mixture reached a rolling boil I added the sugar and brought to a rolling boil once again.
When the mixture reached a rolling boil after I added the sugar I set the timer for 1 minute and still continued to constantly stir the mixture until the minute was over then took the pan off of the burner.
This is what it looked like after I took the pan off the burner. I then scooped the foam off of the top of the jam and placed it into a small bowl. 
 After the foam was removed I filled my boiled/clean jars with the jam leaving 1/8 of an inch of space left at the top of the jar. Then I added the lids to the jars(you can retrieve the lids from the hot water with a magnet tool), I wiped the jars off with a damp cloth to remove any spilled jam and then I put the rings on the jars tightly. I then added the filled jars back to the big pot of boiling water. Placed the lid on the canning pan and let boil gently for 10 mins. 
Then I took the filled jars and placed them onto a towel on the counter where they will now sit for 24 hours to cool and setup.

Here is the full recipe for this strawberry jam:

4 pints of fresh strawberries (measured out to 5 cups when processed/crushed)
7 cups of white granulated sugar
1 packet of Sure Jell Premium Fruit Pectin
2  TBS of lemon juice

This recipe is to make 8 - 8 oz half pint jars but when I made it somehow filled 9 jars. 

1. Bring boiling-water canner, just below 3/4 full with water, to simmer.
2. Wash jars and screw bands in hot soapy water; rinse with warm water. Pour boiling water over flat lids in saucepan off the heat. Let stand in hot water until ready to use. Drain well before filling.
3. Prepare berries as I did above, chopping and processing or chopping and using a potato masher until the strawberries are to your liking.
4. Measure exactly 5 cups of the prepared strawberries and place them into a 5/6 qt saucepan. 
5. Add 2 TBS of lemon to the fruit in the saucepan and stir until mixed.
6. Measure the exact amount of sugar, 7 cups and place in a separate bowl for later use.
7. Stir in 1 box of Pectin (Sure Jell) to the fruit in the saucepan. You may wish to add 1/2 tsp of butter or margarine to reduce foaming, I did not do that but I will next time.
8. Bring mixture to a full rolling boil (a boil that doesn't stop bubbling when stirred) on high heat, stirring constantly.
9. Stir in sugar quickly. Return to a full rolling boil and boil exactly 1 minute, stirring constantly. Remove from heat. Skim off any foam.
10. Ladle quickly into prepared jars, filling to within 1/8 inch of tops. Wipe jar rims and threads. Cover with two-piece lids. Screw bands tightly. Place jars on elevated rack in canner. Lower rack into canner. (OR you can follow my directions for that step above if you don't have a canning rack for your pot) Water must cover jars by 1-2 inches, add boiling water if necessary. Cover; bring water to a gentle boil. Process jam for 10 minutes. You may need to adjust that time according to altitude, visit the Sure Jell website for time adjustments. Remove jars from the canner and place on a towel to cool completely. After jars cool, check seals by pressing middle of lid with finger. ( If lid springs back, lid is not sealed and refrigeration is necessary.)
11. Let stand at room temperature for 24 hours. Store unopened jams in cool, dry, dark place for up to 1 year. Refrigerate opened jars for up to 3 weeks.